Why is the Truss Rod of My Guitar Loose? Defeat the Rattle
Got a wobbly truss rod rattling around in your guitar neck? Let’s dive into why that might be happening.
The truss is a metal stick that lets you tweak the neck’s curve. But when it gets all loosey-goosey, you might start noticing your guitar feels off, and hitting the right notes becomes a hassle.
The wood in your guitar neck can expand or shrink when it’s hot and sticky or cold and dry. This can make the trussrod slacken. Sometimes, it’s just the guitar getting old and tired, or someone got too twist-happy.
By giving it a check-up, you can keep your guitar’s neck as straight as a ruler and your tunes sounding sharp.
I invite you to read on to find out how.
Key Takeaways
- A loose truss rod often happens because of changes in the weather or if you didn’t adjust it right;
- Looking over your truss rod is key to keeping your guitar ready to rock;
- Staying on top of care and taking steps early on can keep truss rod problems from coming back.
Causes of Truss Rod Looseness
The Impact of String Tension
The force that strings exert plays a vital role in the structural soundness of your guitar’s neck. This also goes for the adjustment mechanism within, known as the truss rod. When you swap out the strings on your guitar, you’re tweaking the force applied to the neck.
Opting for thicker strings means they’ll pull harder on the neck, leading to a slight curve or arch. This might cause tightening on the truss rod to balance things out.
On the flip side, if you go for thinner strings or tune your guitar to a lower pitch, the tension on the neck drops off. This slackening can result in a loose or rattling truss rod since it’s designed to counterbalance a higher tension. You might need to ease up on the truss rod to get your guitar playing just right.
Environmental Factors
String tension is one of several things that can mess with your guitar’s truss rod, just like the weather.
The material of your guitar’s neck, wood, reacts to moisture in the air, either swelling or shrinking. This can make the neck twist a bit, leaving your truss rod feeling less tight than it should.
Temperature also has a role to play. If it gets too hot or cold, the wood can change shape, impacting the neck and the truss rod. To keep your guitar in top shape, it’s wise to keep it somewhere that has steady humidity and temperature.
Inspecting the Truss Rod
How to Visually Inspect
If you’re facing a loose truss rod situation, giving your guitar’s neck a good visual check is a solid first step.
Take a peek down the fretboard, starting from the headstock and moving towards where the strings end. Keep an eye out for any clear warps or twists – these are red flags that your truss rod might need attention.
You can also grab a straight edge and run it down the neck to test for evenness. Being thorough here is key – you want to catch any subtle issues. Spotting any uneven spots? That’s your cue that it’s time to tweak the truss rod.
Checking the Neck Relief
To check the neck relief, focus on the bow caused by the truss rod.
The bow makes sure the strings don’t create unwanted fret buzz and helps maintain the guitar’s playability.
Follow this process:
1. Clamp a capo onto the 1st fret to secure all the strings;
2. Push down on the low E string (that’s the 6th string) at the 14th fret;
3. Look at the space between the string and the frets near the 7th fret. A small gap there means your neck has the right amount of curve.
If that gap seems too big or there’s no space, you might have to adjust the truss rod. If you’re unsure what to do, it’s best to turn to a pro guitar tech or luthier. They’re the experts in tweaking truss rods and can get your guitar feeling just right.
Understanding Truss Rod Functionality
What Is a Truss Rod?
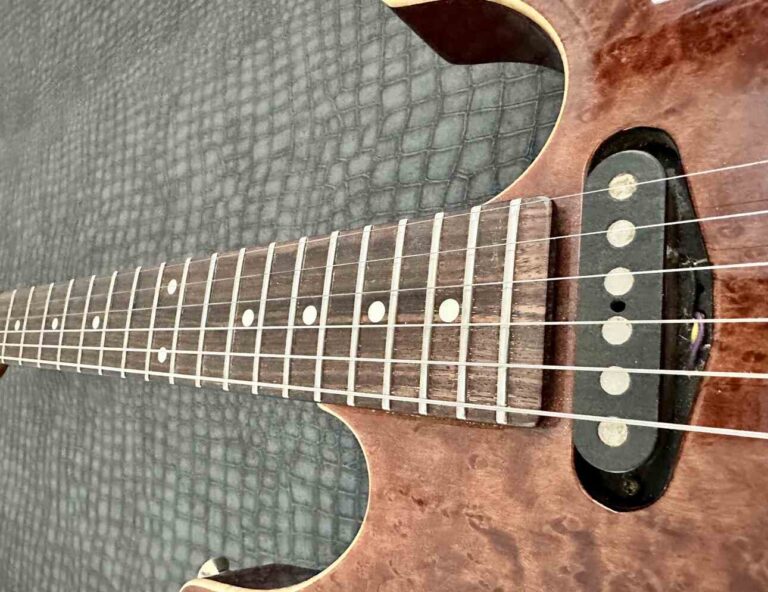
The truss rod is a crucial part of a guitar, keeping the neck stable and properly curved.
You’ll find this metal rod running the length of the neck, tucked inside a groove. It’s there to balance out the pull from the strings, allowing you to tweak it for the best playing experience. Truss rods can be tweaked or fixed, depending on the type.
Signs of a Loose Truss Rod
If you’re a guitar player, you might run into a truss rod that’s not as tight as it should be.
You might notice:
- A strange buzzing or rattling while you’re strumming or picking;
- Trouble keeping the guitar in tune;
- The neck looks too flat or curved, which messes with how it feels to play.
To check if the truss rod is the culprit, tap the headstock of your guitar lightly. A loose truss rod might make a rattling noise. But don’t stress; you can sort this out with careful truss rod adjustments.
Here’s how to approach it:
First, drop the tuning on your guitar to remove some string tension. Then, with the right tool (often an Allen key or a socket wrench), you’ll want to turn the truss rod nut just a bit at a time.
Turning it to the right will tighten it, and to the left (counter-clockwise) will loosen it. After each small tweak, tune up again and check how the neck sits. Keep going until the neck looks right and the unwanted noise stops.
If you’re not totally sure about doing this yourself, it’s a smart move to talk to a pro. A pro luthier or guitar tech can figure out what’s up with the truss rod and get your guitar playing smoothly again.
If it gets too hot or cold, the wood can change shape,
impacting the neck and the truss rod.
Adjusting the Truss Rod
Tools for Truss Rod Adjustment
Starting the adjustment process for your guitar’s truss rod requires a couple of key items:
Your Guitar: Examine the neck’s curve by observing the frets, strings, and neck;
Appropriate Tool: Grab a wrench or Allen key that fits your guitar’s truss rod nut. You usually get the right one with your guitar; if you need help, music shops or online stores are your go-to;
Capo: This little clamp is handy for pressing the strings at a particular fret, simplifying the adjustment process.
Steps to Tighten or Loosen
For a proper truss rod tweak, stick to this plan:
Check the neck curve: Look at the gap between your strings and frets. Make sure the neck isn’t wonky to prevent any harm while adjusting;
Put on the capo: Clamp it on the first fret to keep all the strings down. This helps stabilize them;
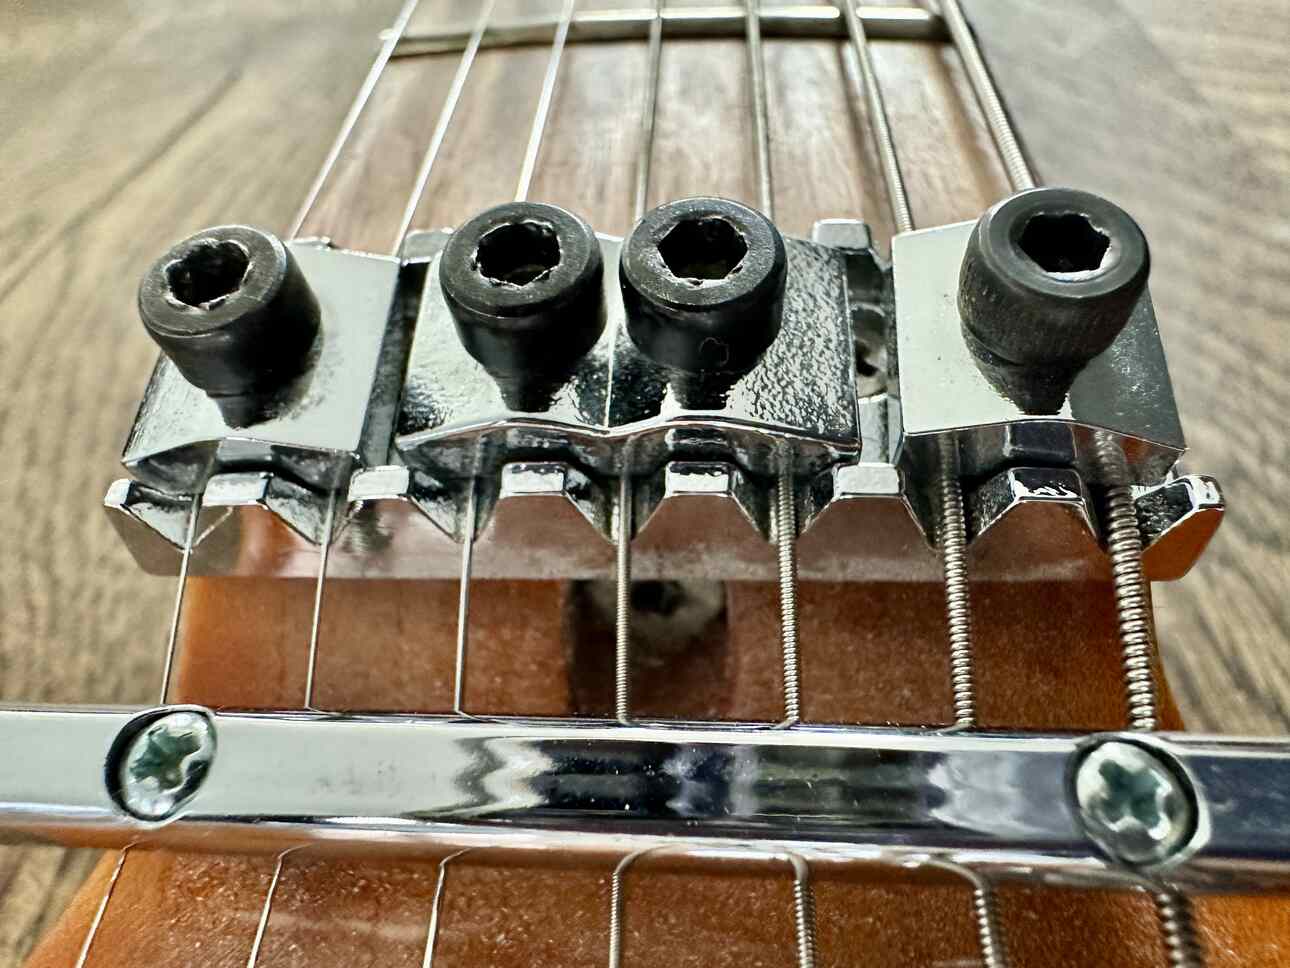
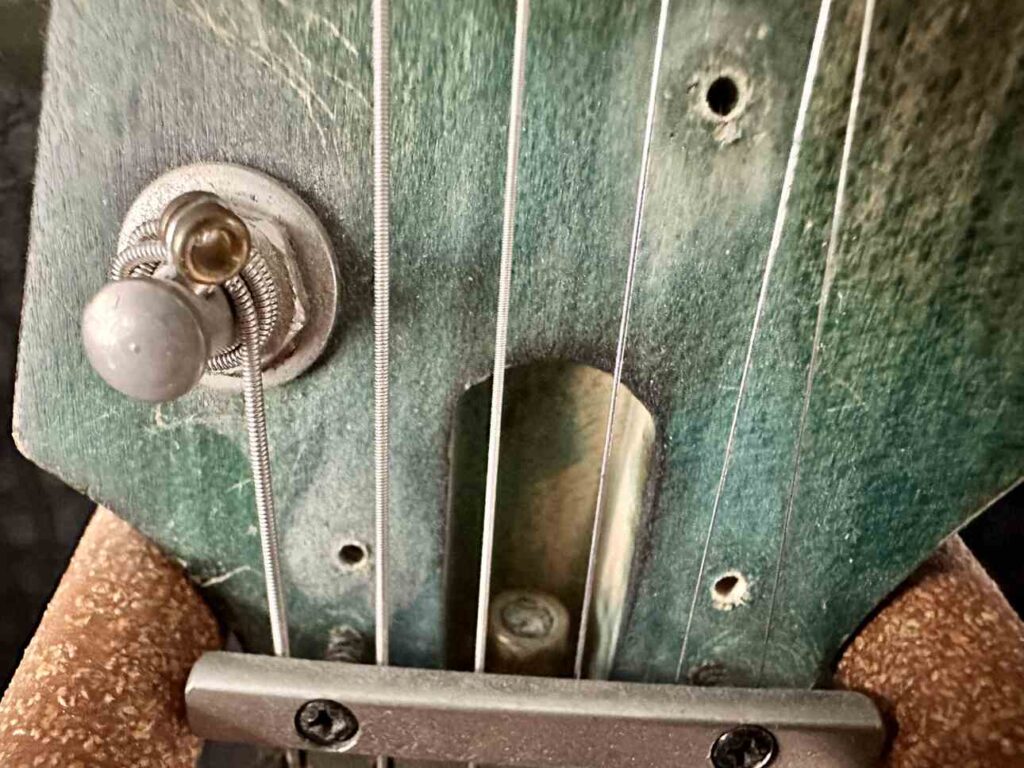
Find the truss rod adjuster: It’s either up by the headstock or down at the end of the neck. You might have to remove a little cover or unscrew a plate to get to it.
Time to adjust:
- Pop the wrench or Allen key into the truss rod adjuster, then turn it carefully;
- Crank it to the right (clockwise) to tighten the truss rod, straightening the neck by pulling back the curve;
- Twist it to the left (counterclockwise) to loosen, letting the neck bend slightly.
Take another look at the neck: After adjusting, release the capo and recheck the neck.
If it’s still not right, go through the steps again, but go slow. Don’t crank too hard or too much – that could mess up the truss rod.
After the Adjustment
After tweaking your guitar’s truss rod, it’s natural to feel a bit tentative about the changes.
To really get a sense of how your adjustments have paid off, you gotta concentrate on two things:
1. Make sure your guitar is tuned up right;
2. Take a moment to assess the action and how it feels to play.
Retuning Your Guitar
Now that you’ve adjusted the truss rod, it’s time to get your guitar perfectly in tune.
Here’s what to do for the best sound:
- Replace your strings if they’re old. A loose truss rod might have put extra strain on them;
- Start tuning with the low E string (the thickest one) and move up to the high E (the thinnest), getting each string to its correct pitch;
- Play each fret to check the intonation. You might need to tweak the bridge and saddle a bit to get it just right;
- After tuning, give it a little time, then tune again. This lets the strings settle, and the tension distributes evenly along the neck.
Evaluating Action and Playability
With your guitar tuned, it’s time to take stock of its action and how it plays. Your personal touch and how you play will influence what feels best for you.
Here’s what to look at when you’re judging your guitar:
- String height: Look at the space between your strings and the fretboard up and down the neck. It should be comfy for how you play, without any string buzz;
- Fret condition: Slide your fingers up and down the neck to feel for any frets sticking out or rough spots;
- Comfort of play: Play some chords and scales you know well to see if the guitar feels different. If something’s off, you might need to fine-tune a bit more.
Preventive Measures and Maintenance
Regular Check-ups
A slack truss rod in your guitar might be down to normal wear or shifts in the weather, messing with the wood.
Staying on top of your guitar’s condition with regular check-ups is key.
Keep an eye on the truss rod, strings, and other bits for any signs they’re getting worn out.
If the truss rod feels loose, you can carefully tighten it a bit. But be careful not to go too far – that could wreck your guitar.
Not sure about doing it yourself? It’s a good idea to get a pro to take a look.
Controlling Environmental Exposure
How your guitar plays can be swayed by the moisture in the air and the heat.
Too much or too little of either can make the wood in your guitar change shape or even warp, which might leave you with a truss rod that’s not tight enough.
To dodge these issues, keep your guitar in a spot where the humidity and temperature don’t jump around too much.
Getting a device to keep an eye on these levels can be a big help.
Also, consider keeping your guitar in a case or a particular spot in your home, and steer clear of places with direct sun or wild temperature swings.
Humidity-wise, you aim for a sweet spot between 45% and 55% to keep your guitar happy. Too damp, and it could puff up; too dry, you risk shrinkage or cracks.
For temperature, a steady range between 65°F (18°C) and 75°F (24°C) is ideal. Sudden temperature shifts can stress the wood, so try to avoid those.
Solving Persistent Truss Rod Issues
When to See a Professional
It can be a real headache if you’re wrestling with a truss rod on your guitar that just won’t tighten up.
When you’ve tried to tighten it, and it’s still not holding, you might be up against something a bit more complex.
In situations like this, it’s smart to contact a guitar repair expert to avoid making things worse.
Loose truss rods can need different kinds of fixes.
A pro might use thin wood glue to secure the rod, or they might even need to redo the rod’s threading.
These repairs are pretty advanced, so it’s best to let a professional handle it.
DIY Repairs and Modifications
If you feel up to the task and want to give fixing the truss rod a shot yourself, here’s what you can do:
- Check out the neck: Look it over for any damage or weird bends that might be messing with the truss rod’s function;
- Give the truss rod a go: Try to tighten or loosen it just a bit. If it’s stuck, don’t push it – forcing it could make things worse;
- Use some glue: If the truss rod is rattling around in its slot, a dab of low-viscosity wood glue might help. Clamp it down to help the loose end stick back down;
You might wedge a sliver of wood beside the rod for trickier fixes to keep it snug.
In really tough cases, drilling a small hole and popping in a wooden dowel can offer more support.
But be careful – messing with the truss rod can damage your guitar if you don’t know what you’re doing. If you’re not sure, getting a pro to take a look and handle the fix is always safer.
Frequently Asked Questions
How do I know when to give my truss rod a twist?
Spot a bend in your guitar’s neck? It might be a sign to tweak the truss rod. To check, hold down the strings at both ends of the fretboard and look at the space in the middle. A tiny gap’s fine, but a truss rod tweak is likely needed if it’s too wide or the strings are smacking the frets.
What’s behind my truss rod slacking off over time?
Your truss rod might slacken from changes in heat and moisture, the normal aging process, and the pull of the strings. These can make the neck warp and the rod slacken, needing some tweaks to keep your guitar sounding right.
Could a slack truss rod throw off my guitar’s action and how it plays?
Absolutely, a slack truss rod can mess with your guitar’s action and how it feels to play. Not enough tension and your strings might buzz against the frets, mess with your tuning, and make playing a chore. Too tight, and the strings sit too high, making it tough to press them down.
What’s the right way to fix a truss rod that’s gone slack?
Start by easing your strings so there’s less pull on the neck. Find the spot to adjust the truss rod, either up on the headstock or down by where the neck meets the body. Grab the right tool and turn the rod clockwise to firm it up or the other way to loosen it. Do it bit by bit, tuning up and checking the neck each time until it feels just right. Then, tune up one last time.
Why’s my guitar making a buzzing noise, and is the truss rod to blame?
That buzz could be a loose truss rod, especially if it sounds coming from the neck. But it might also be something else, like the tuners, the bridge, or something inside the guitar. To check if the truss rod’s the culprit, try tightening it a bit and see if the buzz quits.
What’s the damage for a new truss rod, and do I need one if it’s slack?
Swapping a truss rod can hit your wallet for anywhere between $100 to $400, depending on your guitar and who’s doing the work. But don’t jump to replace it just because it’s slack. Often, a simple tweak does the trick. If you think it’s busted or out of whack, get a pro to look and tell you what’s up.